DIY rug for children's room. DIY children's educational mat: step-by-step instructions with photos and videos

 Live Journal
 Facebook
 Twitter
Many mothers (and you, I think, too) are concerned about the question: how to fully develop a child? After all, everyone is talking about the importance of developing fine motor skills; you can read about it in any book and on any forum about children. And this is not surprising, because it has been established that the development of fine motor skills directly affects the overall development of the child’s brain.
In this article I want to talk about a wonderful toy that will provide invaluable assistance in developing the motor skills of children's fingers - this is a developmental mat. There is a whole expanse on the baby rug: you can touch, wrinkle, pull, unfasten, twist. Fingers are constantly at work, constantly gaining new tactile experiences. There are zippers and Velcro and everything that is so interesting for kids.
I propose to make a developmental mat with your own hands and below I will give several reasons why this is worth doing. Well, if you have already decided to sew this educational toy and are now looking for interesting ideas for making it, then this article is definitely for you. Here you will find various design ideas, and also find out what developmental elements can be used to make it interesting for your child to learn new motor skills. I will tell you about all the elements using the example of an educational rug that I sewed for my daughter.
What are the advantages of a homemade educational mat?
- In this case, it will meet all your wishes and will take into account all the interests and needs of your child.
- You save money. You will most likely sew most of the parts for the rug from scraps of fabric you have, old buttons and other accessories. But, of course, you will have to buy something in addition, mainly appliqués for decoration and missing small details. In any case, such a children's educational mat will cost you less than one purchased in a store.
- The process of making a rug will probably seem very exciting to you; it will use all your imagination.
What will you need?
First you need to choose the fabric for the base. It should be thick fabric, preferably plain. Fleece, thin drape, quilted lining material with synthetic padding, and even a children's flannel blanket are good options. Try to choose a natural fabric for the base, because the child will be on the mat for a long time. The size of the product will depend on the ideas that you plan to implement on it. For my daughter, I sewed a rug measuring 1x1 meter.
For the wrong side, for reasons of economy, you can take a simpler fabric, it could even be chintz.
It will be great if you use filler (sintepon), it will give the rug some rigidity, and when the child pulls the lace that interests him, the rug will keep its shape and will not bunch up.
The following elements can be sewn onto an educational mat for children:
- buttons of different colors and sizes;
- lightning;
- Velcro;
- hooks;
- caps from plastic bottles (along with necks);
- belt with buckle;
- pockets with and without fasteners (buttons or Velcro);
- ribbons, laces, ribbons, large buttons can be attached to them;
- pillows with different fillings (cereals, beans, rustling plastic bags, candy wrappers);
- rattling and musical elements from old toys.
Ideas for decorating a rug
It will be interesting for your baby to play with the rug, even if you just sew all these accessories in a chaotic order. But if you still decorate it in an interesting way, stitch on a lot of appliques, add surprises waiting for the baby under the locks and in numerous pockets, the child will simply not be able to tear him away.
It would be good if the appliqués were not just chaotically sewn onto the fabric, but somehow connected with each other, united by a single design. Here are some design ideas:
Design idea No. 1. The most commonplace plot (which is represented on my rug) is a small landscape with the image of the sun and clouds in the upper part, and in the lower part - houses, trees, roads, cars, etc.
Design idea No. 2. You can make a rug in the form of a roadway, where there will be houses, cars, traffic lights, gas stations, garages; such a rug will also be interesting to drive cars on.
Design idea No. 3. You can make a rug on the theme “Seasons”; for this, the base fabric will need to be roughly divided into 4 parts and appropriate appliqués made in each of them.
Design idea No. 4. Similarly, you can expand on the theme “Weather”: in one part it’s cloudy and raining, in another the sun is shining and the grass is green, in the third everything is white with snow.
Design idea No. 5. The rug can also represent one large house or a castle with many windows and doors.
So, what developmental elements can you sew onto a rug:
- Sun. Buttons are sewn onto the sun as eyes and nose. The rays are made of ribbons that are attached to only one edge. Some ribbons have buttons on them. Looking at the sun and feeling the buttons, the baby will remember where his eyes, nose, mouth, and rays are.
- Cloud #1. There is a rustling plastic bag sewn inside the cloud. When Taisiya and I rustle a cloud, we say that since it is making noise, it means it will rain soon.

- Cloud No. 2. In this cloud, rain can not only gather, but also begin for real. In order to see the rain, the baby will have to unzip the zipper and take out the ribbons from the cloud. If you want sunny weather, fold the ribbons back and fasten the clasp.

- House. A window and a door open in the house. The window is locked with a button, the door with a hook. If the baby manages the locks, he will see who is hiding inside. Such surprises are very attractive to kids and motivate them to play around with the tricky clasps.

- Tree.“Apples” are attached to the tree using Velcro. Each “apple” has its own filling: beans, rice, paper candy wrappers, etc. “Apples” can not only be picked from the tree and hung again. You can also put them somewhere. For this purpose, you can sew a basket-shaped pocket nearby. We put our “apples” in the train trailers.

- Car, road and mountain. Children also really like moving elements. We have a car moving on the rug. There is a thin black ribbon stretched from the house to the mountain along which the car can be moved. Thus, it turns out that our car drives away from the house, passes along the road behind a tree, then drives over the mountain and disappears there.

- Steam locomotive carriages. The trailers are pockets. Each pocket hides a character. To prevent the inserted toy from getting lost, it is advisable to attach it to the mat with a ribbon.

- Steam locomotive. Caps from plastic bottles along with necks are sewn in as locomotive wheels. If you use lids of different sizes, it will be more interesting, and you can also reinforce the concepts of “big-small”. Under each lid there is a surprise - a small applique with the image of an animal.

- Bridge and river. The bridge over the river is made from part of a belt with a buckle on it. Thanks to this bridge, the child will develop another useful skill - unfastening and fastening seat belts. And, as usual, to the delight of the baby, a surprise awaits him under the bridge - a fish.


- Christmas tree. If your child wants to decorate the Christmas tree with garlands, he will need to handle the lacing. And if you bend the branches of the Christmas tree, you can see a hedgehog hiding there.


After the main part of the work on the rug is completed, sew the fabric on the wrong side.
Always remember that the baby will not spare your creation, he will use it to its full potential. Therefore, try to sew all the elements of the rug as tightly as possible to avoid tearing off small parts. It is advisable to finish the edges of the appliqués with an overcast stitch to prevent them from crumbling.
In my experience, a developmental mat becomes truly interesting for a child from about 1 year of age and does not lose its relevance for a very long time. The baby will gradually master the elements of the rug. At first, he will only feel and examine, watching with curiosity how you unbutton and fasten the clasps before his eyes, but he will soon understand that he himself can unscrew and unfasten something. Already at the age of 1 year 3 months, a child will most likely learn to cope with Velcro and zippers. In our house, an educational rug is one of the most “long-lasting” games; it is clearly not a toy that is played for at most 2 evenings. My daughter takes out the rug from time to time and enthusiastically plays on it to this day.
I wish you success and interesting ideas in making your own educational mat! And be sure to tell us about your ideas! I think they will be useful to many mothers.
Parents strive to develop their baby from birth. They acquire a huge number of toys that help the baby explore the world. A children's educational mat is included in the list of useful devices for a child. It is sold in a children's store, but most people want to build it with their own hands. And it's quite easy to do.
Children's educational mat 
Children's educational mat
An educational mat is a canvas made of fabric or knitted using yarn. It is complemented by bright applications and various moving elements that the baby can play with. Sometimes the rug is equipped with a frame from which toys are hung. It is used from the moment of birth, which allows the child’s development to begin from 0 years and older.
Among the functions of a children's educational mat are the following:
- Help in concentrating the child's attention on objects. Improving coordination, training fine motor skills of the hands due to constant fingering of fixed elements.
- Development of mental abilities and training of logical thinking with tasks in a game format.
- Learning and memorizing different geometric shapes, their differences in shapes and parameters.
- Training in recognizing colors and shades, memory training.
- Development of imagination.
- Teaching the alphabet and counting.
 Children's rug with a steam locomotive
  Light educational rug for a child with sheep
 A newborn baby's brain is not fully developed. At the beginning of life, neural connections begin to develop most actively. This is positively influenced by the environment that surrounds the child. How often and effectively you work with your newborn is of great importance.
An educational mat is one of the most useful toys. It combines a platform not only for play, but also for the development of the child. When the baby learns to sit on his own, he will no longer need the help of strangers, and he will play alone, without his mother.
 Bright
  Developmental mat for a child
 Advantages of a homemade rug
Among the advantages of building a developmental mat with your own hands, the following factors can be noted:
- When you make an item yourself, you can put your soul, care, and love into the project.
- The material is chosen by you personally. In this case, you will definitely be sure of the composition of the toy.
- You can make a rug of the required size and shape, rather than adapting to a ready-made option.
- You will have a lot of fun. You can realize your own ideas by turning on your imagination and realizing creative ideas.
- Educational elements and other decorations are selected by you yourself. You can bring your own idea to life by decorating it in a special way or repeating existing designs.
- The product will be original, one of a kind and will fully meet the needs of your baby.
 Rug for a child
  Developmental mat for a child
 Deciding on design and construction
The final model will depend on many factors. First of all, the child’s gender and range of interests matter. Girls prefer round rugs. It is necessary to divide them into large zones, which must be clearly defined. Do not make the details on the toy too small.
A separate type is suitable for boys - these are car mats. And everything on it should be like in real life, traffic lights, zebra crossings and so on. If the baby prefers to play alone, you can design the canvas in more detail and stylize. If he prefers to use the design in company with someone, for example his brother, then it is recommended to depict everything more closely to the real road.
 Developmental mat for a child
  Beautiful large rug with the child's name
 If it is difficult for a toddler to sit still, then the product is complemented with a soft barrier. It is not necessary to build it massive and tall. Place the barrier structure in the center. This will help keep your baby on the mat for development. A soft barrier is preferable to a playpen in psychological terms. It helps to unobtrusively keep the child in the play area.
There are models equipped with special arches. You can make them yourself. Such a rug can replace a children's playpen and not have an intrusive fence. It will help the child develop self-discipline and will not create physically insurmountable barriers. A developmental mat with arcs will not allow the baby to fall backward, unlike a playpen.
 Children's educational mat with various patterns
  Children's educational mat
 Necessary materials
To build a developmental mat, stock up on the following materials.
- The basis. Foam rubber or a baby blanket is suitable for it. You can choose a soft fabric, but it must be dense.
- The material with which the canvas will be covered. Decorative elements are also made from it. Opt for options made from natural fabrics. The toddler will spend quite a lot of time with this toy, and it should not cause rashes or irritation. You can choose any colors. It is recommended to avoid too bright, neon shades. They do not have a positive effect and will quickly begin to irritate the baby.
- Related items. You can use buttons of various sizes and colors, threads of various shades, colored zippers. Rope, braid, elastic bands, Velcro and other details required for decoration will come in handy.
 Children's educational mat with a house
  Children's rug with a pattern
 Required Tools
To build a developmental mat, use the following tools:
- scissors;
- needles;
- threads matching the color;
- sewing machine.
Few tools are required, much more material is needed. The process itself is quite easy and simple.
 Children's rug with a house
Manufacturing process: step-by-step instructions
A simple diagram will help in manufacturing. On paper, draw what the future toy will look like, its shape, size, and draw additional details. This will make the job faster and easier. When making a gaming accessory, follow the instructions.

 Children's mouse pad
 Preparing the base.
Using scissors, cut the panel from the main fabric in accordance with the selected parameters. The same should be done with the future lining and padding polyester. The resulting elements are arranged in three layers so that the padding polyester is in the middle. Using thread and a needle, connect the parts into one whole base. The edges are finished with overlock. To do this, you can take the edging or simply bend them.
 Children's rug with a road and a river
  Children's educational mat with fish
 Construction of the playing field.
When the base is completed, it is on it that they begin to recreate the playing field. It has already been noted that before starting work, you should make a sketch of how the product will look in the future. You can place any objects in this area, a flower bed, a forest, a river, a road along which cars will drive, etc. Use your imagination and remember the child’s hobbies and interests. Shapes of the desired color and size should be cut out of the fabric. After manufacturing, they are attached to the base. Sew everything by hand first, then use a sewing machine. Some parts can be attached to the base using a soft adhesive - non-woven material. It is easier and more convenient to work with.
 Children's mat for games and development
 Construction of game parts.
This stage of work is the most labor-intensive. The details for the game can be flowers, mushrooms, birds, castles from fairy tales, etc. A boy can build boats, cars or airplanes. Once the game pieces are made, they can be secured using laces or ribbons attached with snaps or Velcro. Thanks to this they will become mobile. You can simply sew them on. To add volume, fill them with padding polyester.
 Bright children's educational mat
 Pinning objects.
Place the prepared parts on the base as shown in the sketch. Each composition must be completely completed. Place objects in the right places and securely fasten them. Then you definitely need to check how firmly everything is attached, so that during the game nothing falls off, or the baby does not tear something off.
 Kids rug
 The final stage is decoration
It has already been noted that various figures can be built from fabric or other raw materials as decoration. Make a boat that can move along a special attached cord. If there is a house on the canvas, build windows and doors that will open so that fairy-tale characters can come inside.
For small objects, pockets are made that are closed with a zipper. Drawstring buttons or small beads would be a great addition. It is important that they are of different colors, and the child can move them.
 Children's rug with drawings
  Children's educational mat
 In addition to houses and cars, you can make various animals. If you decide to place a lake on the canvas, make it from polyethylene. It must be transparent. Can be replaced with organza. Place the fish under the plastic. To construct the lake itself, use fleecy fabric of a suitable shade. An educational rug that you make with your own hands will be able to reflect your ideas and fantasies, and will bring a large portion of positive emotions, fun and joy to your little one. Especially if it becomes a reflection of the baby’s interests and hobbies. Game and development will take place simultaneously.
Many parents find this accessory very useful. In addition, while the little one is busy with the bright parts of the canvas, mom and dad have time to do household chores.
Video: How to choose a developmental mat for children
50 photos of ideas for educational mats for children:


Any mother can make a rug that develops logic, thinking and fine motor skills of a baby. On it, the child will get acquainted with bright colors and textures of materials, and then, as he grows up, play various games with fairy-tale characters. In addition, while the baby is busy playing, the mother can calmly do household chores.
Rugs can be on any theme: the world around us, plants, animals or fairy tales. You just have to take into account the characteristics of your child, be patient and use all your creative imagination. And our tips on how to sew a developmental rug will help in this difficult but exciting task.
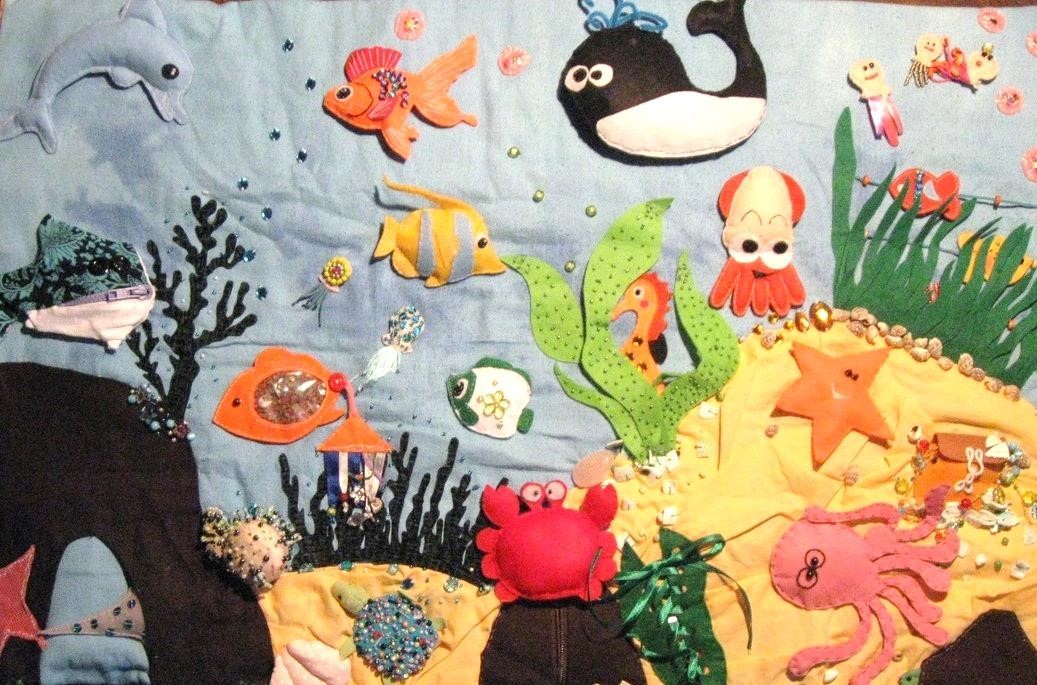
Rug "The world around us"

Materials:
- pieces of material of various colors (blue, blue - for the sky and sea, green - for grass, yellow - for sand, etc.);
- fleece, organza (for sea waves and clouds);
- synthetic winterizer (as a filler);
- decorative braid;
- Velcro tape;
- buttons of various textures, beads, brooches, animal appliqués.
Tools:
- threads, needle;
- sewing machine.
Stages of work
Useful tips
Educational pads for the youngest children

For very small babies, a rug made of multi-colored soft pillows is perfect. To do this, you need to cut out the required number of identical squares from material of different colors and textures. Then the same number of base squares are cut out, but of a smaller size.
Each multi-colored square is assembled to the size of the base square, sewn in this form to the latter and stuffed with any kind of filler. Next, the resulting pads are connected to a piece of material, which serves as the base of the entire rug.
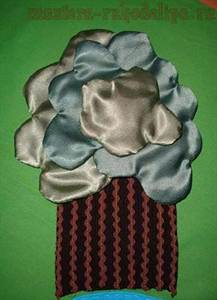
Educational tactile mat “Sun”

Such a “Sun” can not only serve as a resting place for the baby, but also introduce his fingers to various tactile sensations that help the development of fine motor skills. The center of the sun is made of a round piece of material stitched with padding polyester, and its petals or rays are made of multi-colored cotton fabrics.
Each petal is stitched in the form of a pocket, which is filled with various materials: beads, cereals, pasta, beans, sand, rustling polyethylene, buttons and small pebbles.
Folding "Garage"

For older children, you can sew an educational folding mat in the form of a garage for cars or doll houses, which will introduce the baby to numbers and teach them to neatly fold their toys. Since such a garage easily folds, you can take it with you on a walk, to visit or to kindergarten.
The base of the rug is sewn from thick denim fabric. A ribbon of the same material is sewn on one side, which is divided into pockets. A number is glued to each pocket. A felt road is sewn on the side opposite to the pockets. A loop and button are attached to the back of the rug.
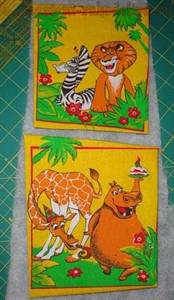
Mat with pockets for photos

This educational toy for a baby is convenient because it can replace several educational books. After all, in pockets with a transparent wall you can place any images: animals, household items, plants, numbers, letters or photos of family members. A child will never get tired of playing with such a toy, because the inhabitants of the houses can be changed as they grow older.
Sewing such a rug is very simple. To do this, houses with a window made of transparent material, such as vinyl, are sewn onto a fairly dense material, and in the center there is a ring road with branches to the houses. The universal developmental mat is ready!
When a baby comes into the family, every mother has many questions. The main topic that interests everyone is the problems of proper education. In children's stores you can find many educational and educational games. But I want something original for my child, made by myself. Try to make a children's educational product - a rug; it will not be difficult to make it even with your own hands.
Pros of DIY children's educational rugs
- Soft and bright, they attract children's attention;
- By placing your baby on such a rug, you help him concentrate his gaze on one object;
- The rug is made with a large number of convex elements. Children begin to reach for the object that interests them, developing motor and tactile sensations;
- Sound effects. When you click on a certain square, the child hears a signal or melody. Auditory memory develops.
Key points in product manufacturing
Use thin foam rubber or a baby blanket as a base for the rug. Choose natural fabric with which you will cover the base.
You will need:
- several scraps of material;
- scissors, needles, threads;
- applications;
— candy wrappers to create rustling buttons;
— decorative elements (braid, zippers, Velcro, rattles, elastic bands, etc.). All finishing accessories must be safe for children.
Consistency in execution
- Decide on the size of the product;
- It is advisable to make the part of the rug that is adjacent to the floor oilcloth. It will be convenient to clean it;
- Use the material from natural fabrics. Make sure that they do not fade when washed;
- Prepare a drawing of what you ultimately want to get;
- Cut out the material for the top. Carefully sweep all elements;
- Sew prepared appliqués and characters from your sketch onto the main canvas;
- Firmly attach the decorative trim, sew in noise and sound elements. Take this part of creativity seriously. Children are inquisitive and taste everything. It is necessary to sew with strong threads and very firmly. Choose zippers with sparse, rounded teeth.
- Now connect the top and bottom sheets, placing a foam base between them. Sew up the edge.
To clearly demonstrate what can happen as a result of your creativity, here is a selection of photos with various options for children's educational rugs:


A selection of videos will help young mothers just starting their journey in needlework:
Game elements for a children's mat for development
It's not hard to come up with them. The elements can be filled with sound and rustling components, and contain pockets for other toys. The use of zippers, braid, beads and other accessories will help you create original compositions.
How to make a simple but interesting educational mat has already been discussed above. Now some information about how you can decorate it with your own hands. What developmental elements are suitable for its manufacture.
- Musical "berry". Take a box from a Kinder children's toy. Place a small bell inside and crochet it in the shape of a berry. Attach a string to it so that the child can pull it and hear the bell ringing. Sew the resulting berry to the rug.

- "A steam locomotive for animals." Pockets are prepared in the form of trailers with slits on top (with their help you can change animals in the trailers). Instead of wheels there are multi-colored buttons.

- "House". It should have a door that can be opened. Instead of a lock there is a button (for training the child’s fingers). Place the Velcro character inside the house. The inhabitants of the house can be periodically moved to another place on your carpet.

4. “Apple with a worm.” It is attached in such a way that it can be hidden in the apple.

- "Ladybug". A zipper is attached to the back, unfastening which the child discovers another toy.

- "Book". Helps develop motor skills of the child's fingers. As he turns the pages, he will find new fairy-tale characters.

Master class on making toys
We prepare materials of different textures, finishing elements, threads, needles and a sewing machine.


We make the rug from four squares, which we sew together.

We attach a large piece of blue fabric in the center. This will be a lake.

For wood, you can use a brown scrap with stitched braid.

We pass grass along the edge of the lake (green braid collected with an accordion).

We attach a crown consisting of several elements to the trunk.
Along the edge of the lake we sew Velcro, cut into squares.


We are building a house on the shore of the lake.

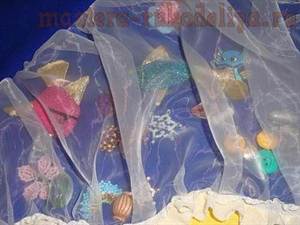
Cooking animals. We put thin padding polyester and film on the material with images of animals and stitch everything together.


We place the animals on the carpet.

We make sea creatures.


Despite the great variety of educational rugs for children in stores, very often we cannot choose a specific model. And this is not surprising, all babies are special. But it is difficult to determine exactly what is special about them in the first weeks of life. Therefore, usually the choice either falls on all the rugs at once, or none of them suits our needs.
If you still can’t decide on the choice of rug, then know that you can create it yourself! Desire and knowledge of the basic principles of their design are enough. That's what we'll talk about next.
Basic requirements for hand-sewn rugs
Even if you already know exactly what type of rug you need, don't rush to grab a needle and fabric. It is very important not to forget that educational rugs become your baby’s main toy for a long time, a faithful companion and assistant in exploring the world. Therefore, first you should study the basic requirements for such rugs, and only then start sewing them.
Attention to detail
The best child psychologists work on the development of modern rugs and use high-tech equipment, but handmade rugs have their own number of advantages:
- you choose the materials for the rug yourself and are confident in their safety,
- you decide how many games and game elements will be on the mat,
- you yourself determine the size of the playing field of the future rug, and it may differ greatly from the standard ones offered by global manufacturers,
- your rug will be created exclusively for your baby, it will provide and take into account his characteristics and preferences, his love for certain games, as well as colors.
That is why most mothers still prefer to sew educational rugs for children with their own hands.
But before you start sewing such a rug, you need to remember several important requirements for the work, so as not to be disappointed with the result.
1) If you are going to develop your baby’s fine motor skills, then choose different objects that will perform this function.
The child will quickly get bored with the monotony, and he will lose interest in the game.
2) If you want the rug to last you a long time, leave some free space to add new games.
In the first days of life, the baby will play more and more interestingly with large details, images and beads, but the older he gets, the smaller and more detailed the subsequent sectors will be.
3) For the base of the rug, choose bright colors, but not flashy or glossy, so that the baby’s eyes do not get tired and the passion for playing does not disappear.
4) Consider the arrangement of sectors and game elements on the canvas so that they not only include maximum benefit as an educational game, but also fit harmoniously into the overall idea.
The field must be logically structured, otherwise the child will not see the final goal and soon his interest in the game will disappear.

Do not forget that the main purpose of the rug is the development of your baby in a playful way. And therefore it is very important that he finds it interesting, fun and educational.
To create an educational rug for children with your own hands, you will need a lot of different materials. But this does not mean that it should be full of beads, laces and chaotically stuck Velcro, which will only disturb and confuse the baby.
First, you need to think about the main theme of the rug, decide on its main tasks and functions, and then start stocking up on materials.

The first thing you need to sew a developmental rug is fabric.
It is needed both to create the base and for most of the applications that will decorate the playing field. Therefore, when selecting it, pay attention to the following:
- For the wrong side, a non-slip fabric is suitable so that the rug does not slide on the floor,
- For the base, a plain, dense fabric is more suitable so that it can withstand frequent use of the rug,
- for decoration and appliqués, thin fabrics are suitable - chintz, calico, cotton,
- for rustling elements, choose raincoat fabric, artificial silk,
- for games aimed at developing tactile sensations, velvet, suede, corduroy, etc. are more suitable.
As you can see, you will need a lot of fabric to create a developmental mat.
Don’t forget about the fittings, which play an important role here:
- , zippers and teach children how to fasten parts;
- Rubber bands will help you hide and take out individual game elements, as well as depict natural phenomena. For example, rain or the sun peeking out from behind the clouds;
- beads, sequins and colorful stones will attract attention and develop the baby’s color perception.

Look around, not only sewing accessories can help you create an educational rug. Everything will come into play:
- peas, beans, millet and buckwheat - as a filler and to create rustling toys;
- woolen threads - as an imitation of grass or animal hair;
- bright candy wrappers - as inserts and sound effect.
And this is not the entire list of materials that may be useful to you. Each rug is unique, just like its owner. Therefore, you decide for yourself what suits you to create it.
Just don’t forget that all materials must be natural and not hazardous to the baby’s health.
Sew small details firmly, and choose the fabric wisely so that it does not fade or stain children’s palms.
We create an educational mat for children with our own hands
As we have already said, educational mats for children come in different varieties. They differ not only in size and content, but also in purpose, since they are created for the specific age of the baby. So first decide how long you want the mat to last, and only what suits you best. And we will try to figure out how to create the basis and how to complement the playing field of the most common types of children's rugs.
DIY rug with arcs
Since rugs with arches and sides are best suited for infants, it is worth making them bright.
In addition to the previously mentioned materials in the form of fabric and accessories, we will also need arcs. A gymnastic hoop or metal-plastic pipes will help us with this.

Therefore, to create a developmental rug with arcs we will need:
- plain fabrics of bright colors - calico, chintz, cotton;
- non-slip fabric for the back of the mat;
- padding polyester;
- a gymnastic hoop with an approximate diameter of 65 cm or 3-4 meters of metal-plastic pipe.
First, decide on the size of the rug itself.
The most common size of a developmental mat with arcs is considered to be 90x90 cm, but you can decide for yourself what area your baby’s playing field will be.
Mat base
Cut out a square of the required size from the main fabric for the front side of the rug and exactly the same from non-slip fabric, which will become the back side. Sew them together and turn them right side out, but leave enough opening for stuffing.
To make it soft to lie on and turn over on the rug, insert several layers of padding polyester into the resulting blank and then sew everything up.
To prevent the padding polyester inside the mat from shifting or crumpling, quilt the future mat (all layers of padding polyester and fabric), either by hand or on a sewing machine.
This is how we have created the basis for an educational rug, which can be decorated immediately or over time with toys and appliqués for your fidget.
Arcs
Now let's move on to the arcs.
If you choose a gymnastic hoop, then you first need to cut it in half to get a frame. Then the arches need to be made safer and softer. Therefore, we again take out the padding polyester and wrap it around the blanks.
When the arc is not visible under the padding polyester layer, and you consider it as soft and safe as possible for the baby, take the fabric, sew a long tube from it, turn it inside out and insert the resulting arc into it.
Connecting the arches and the base of the mat
Don't forget that the arcs up must be connected together, for this you can:
- sew two laces into one of the fabric tubes, with which you will then intercept both arcs;
- cut a ribbon from the main fabric with which you will tie the arcs;
- take any braid or ready-made tape.
Once the base and arcs are ready, the main question remains: how to connect the two main elements together?

If you do not plan to assemble and disassemble the rug, you can sew the fabric that wraps the arcs to the corners of the rug. Your developmental mat will now be ready and ready to use.
If you plan to make it more transportable, then at the stage of sewing the base you should think about options for attaching the arches.
You can cut small pockets in the form of pipes with a diameter a couple of centimeters larger than the arc, and sew them to the corners of the base of the rug.
Olga Volkova clearly demonstrates the process of such a connection in her master class:
You can cut through the base of the rug at the cutting stage, overcast the resulting loops and sew Velcro on the back side. Attach its second part to the finished arc and insert it into the loop. This is exactly what Lyubov Lozinskaya suggests doing, sharing the tricks of creating a mobile and bright educational rug in her master class on creating a children's rug.
If you plan to use the developmental mat after the baby learns to walk, then the arcs can be assembled separately from the playing field.
To do this, you just need to cut them to the required length, wrap them with padding polyester and cover them with fabric, and then form an arc by pulling the ends of one pipe between each other with tape. You will get a strong frame of two arcs, on which you can lay any rug of suitable size.
Calculation of pipe length for arcs
To do this, simply multiply the diagonal of the rug by the number π, equal to 3.14, and then divide the resulting result in half.
For example, you want to assemble arcs from a pipe for a rug measuring 90x90 cm. They will be installed in the corners of the field, therefore, the base of our semicircle will be the starting point.
So, the diagonal of our rug will be 126 cm (90 cm x 1.4). Now we need to multiply the resulting number by 3.14 - 126cmx3.14 - to get the circumference of the intended circle, which will be equal to 395.65 cm. But since this is the length of a full circle, we need to divide it in half - 395.65 cm/2 = 197.82 cm. In total, we will need two cuts of a metal-plastic pipe with an approximate length of 198 cm. If the arc turns out to be too high, simply reduce the length of the pipe until you get a satisfactory result.
Please note that one pipe should be several centimeters longer than the other for greater stability of the structure.
DIY rug with arcs and sides
Another distinctive feature of educational mats for younger children is the presence of not only arches, but also sides so that fidgets remain in place.

As we have already said, such rugs come in several types:
- with attached sides;
- with sides that are part of a large rug.
Pillows, bolsters or other soft restraints can become additional sides.
If you want the rug to become your assistant for a long time, then your choice is a rug with lifting sides. After all, it has two sizes - assembled and disassembled.
To sew such a rug, you first need to create the correct pattern. To do this, decide on the size of the initial, small rug. Draw this square or rectangle on paper, and now add a rectangle on each side, the height of which will be the height of the wall. This is exactly what your foundation will be.
In places where the sides will fold, you can sew laces or ribbons. Then to assemble the rug you will only need to tie them tightly together. If you prefer Velcro or buttons, then sew them along the entire height of the side.
The process of creating such a rug can be seen more clearly in a small master class by a young mother.
DIY themed or play mat
And yet, the most popular among educational rugs for children are play mats. After all, they have so many interesting and fun things to do!
The base of such a rug can be sewn in different ways:
- a single piece of fabric, to which appliqués and educational toys will then be sewn;
- separate sections that will be connected, increasing the rug in size over time.

But in any case you will need:
- several large pieces of fabric;
- synthetic winterizer or foam rubber as a sealant;
- scraps of bright fabric of different textures;
- buttons, beads and other accessories;
- locks, Velcro and elastic, etc.
First, decide on a sketch of your future rug:
- consider the size of the finished product and whether you will sew it from scraps or from a solid cut;
- think over the location of the games and the logical transition between them;
- come up with a plot for the rug.
It is very important that everything that happens on the mat has meaning and pattern. Do not try to place games with bees and hedgehogs in the middle of the sea - this will only confuse the child.
The choice of rug type can also be an excellent clue. You can sew:
In any case, you will need a base sewn from two pieces of fabric and layered with filler to make the mat as safe as possible for playing.
Afterwards you can sew game elements to it in the order you require.
If you have chosen a map of the area as your subject - a forest, a highway or a park - then you can divide the field into sky and earth. At the bottom place trees, a road, small animals or houses, at the top you will have room for clouds, sun, birds and airplanes.
Don’t limit your imagination, you can always add a new object to the rug by simply sewing it on or swapping it with another one.
Use Velcro, buttons and zippers to connect toys. So an airplane can fly in the sky, attached to a zipper slider, in a house, windows can open and close with a button, and a hedgehog hiding under a bush can pick apples or berries, which are attached to it with Velcro.

Cute soft hedgehog
When creating educational rugs for children with your own hands, be sure to pay attention to the variety of types of toys:
- sew or knit noisy objects - pour buckwheat or beads into a chocolate egg capsule, tie it or cover it with fabric, giving the toy the image of a bee, butterfly or rabbit;
- use felt for flat appliqués that will move across the playing field and be attached with Velcro, snaps or buttons;
- provide pockets with zippers in which there will be;
- Sew appliqués with a candy wrapper inside into separate sections of the rug; such rustling noise will not go unnoticed by the little fidget.

Collection of toys for the rug
If you have not yet decided on the plot or are not confident in your abilities, then take a look at the video master class by Handmade Tailor. Here you will be inspired to create a simple play mat with different elements and principles for attaching toys.
If you doubt your seamstress skills, then you can use the excellent idea of Svetlana Rost, who suggests creating an educational rug based on pillows for stools. This way you can increase or decrease the size of the playing field, swap games and tasks, or even temporarily remove those that your baby is already tired of.
Double-sided developmental mat
Practical parents prefer double-sided rugs that contain two playing fields. This way they will provide their baby with something to do for a long time and save the family budget.
But when creating such educational rugs with your own hands, keep in mind that the baby will move around on it and nothing should interfere with him. Therefore, you should avoid bulky and hard objects that can cause unnecessary abrasions and bruises.
As with play mats, first you need:
- come up with a plot;
- draw a sketch and map;
- prepare materials.
Afterwards, you sew all the game objects and Velcro onto the prepared playing fields and sew them together using the quilting sandwich principle - fold the playing field, apply the padding polyester to the wrong side and place the second playing field, the wrong side to the filler. Sew the resulting sandwich together, sewing tape along the edge.
For playing on such a developmental mat, the most suitable toys are made of felt, which can be rearranged, shifted or used for both sides.

Puzzle mat or puzzle mat
If your baby is already old enough and independent, then he will like the idea of assembling his own rug. The process of folding itself will become an excellent game for him and a test of logic, spatial thinking, as well as the relationship of shapes to each other. This is exactly why puzzle mats or puzzle mats were invented.


Big puzzle for a little man
Most often, such mats are made of PVC, i.e. It will be difficult to reproduce their production at home. But handicraft mothers found a way out and began sewing puzzle rugs in the form of many soft pillows that can be easily connected to each other.

To create these educational mats with your own hands you will need:
- fabric - felt, fleece or cotton are best;
- filler;
- pattern.
First, think about how many pillows you want to sew and what shape they will be. Draw the assembled puzzle and cut out each piece separately - this will be your pattern. Then simply transfer it to the fabric - each detail should be cut out in duplicate, which will then be sewn into pillows.
Fill the pillows tightly with padding polyester or any other filling, sew up the hole and you can give the finished rug to your child to play with. He will decide for himself how to collect it and what to do with it next.
To add another element of play and test the child's logic, you can sew an applique to the pillows in the form of a labyrinth or a road, which will need to be connected in the correct order.
Eclerka and her detailed master class will help you understand the process of creating a puzzle rug in more detail, in which she shares the intricacies of cutting and sewing pillows.
As you can see, in order to give your child full development and help him understand the world, you don’t have to run to the store and buy everything from its shelves. Sometimes it is enough to show imagination and ingenuity, and also to give him your love by creating a comfortable, useful and interesting educational rug. And what it will be like and what it will teach your baby is up to you to decide.
- Personalized icons of Gregory the Illuminator of Armenia
- Church of the Life-Giving Trinity on Vorobyovy Gory
- Feng Shui of the office - attracting clients and money Feng Shui massage room
- See the meaning of Hirt, August in other dictionaries
- Why do you dream of a watermelon: interpret the meaning of the dream
- What does a young man or guy dream about?
- Dream interpretation of dreams: why do you dream about salt?