How to make a drain in the bath
 Live Journal
 Facebook
 Twitter
An integral part of the steam room is water. But so that it does not stagnate, it is important to know how to make a drain in the bath. In this case, certain nuances must be taken into account. For buildings that are on piles, a thoughtful approach will be required so that communications do not freeze. Depending on the load on the premises, different decisions will be made.
Even before construction
It is worth thinking about even before the laying of the foundation begins. In this case, it will be much easier to draw a conclusion. The following points should be analyzed:
- What is the size of the planned building?
- What is the frequency of its use?
- How many people will be inside at the same time?
- Will it ?
- Will the washing room be a separate room or combined with a steam room?
- What is the depth of soil freezing?
- What is the composition of the soil?
- Is there a central sewer?
- How much free territory is there around the bath?
This questionnaire will greatly simplify the creation of a gasket drawing, and will also provide an opportunity to determine which of the options that will be described below is best for a particular situation.
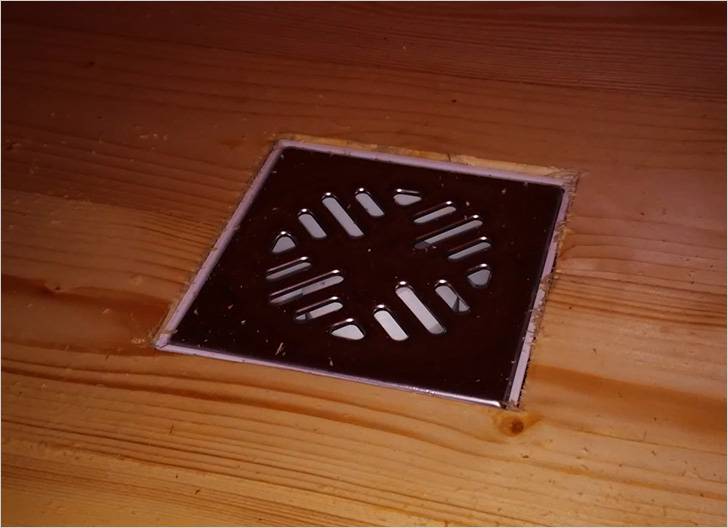
Briefly about the floors

The ladder for different designs will also be different. If this is a bathhouse that is constantly heated, or it is known that the room does not freeze through, then you can install a product with a water damper. Usually it is located in the corner or in the middle, where all the liquid collects. Installing such a structure in a wooden floor will not be difficult:
- Work is carried out before the final floor is installed.
- The location of the drain hole is selected according to the slope of the surface.
- Marking under the ladder is being made.
- A hole is drilled so that a jigsaw file can be inserted. An opening is cut out for the product.
- The entire surface of the floor is covered with a dense plastic film.
- A slot is made in the place where the drain hole will be located.
- The plastic drain is mounted in place.
- The joints of the film are coated with silicone sealant.
- Finished flooring is being produced.
Note! With this solution, even if water seeps somewhere under the floor, it will flow down the oilcloth to the drain point.
But most often, baths are used less frequently, and if a similar design is made there, then this may be fraught with the fact that the water inside freezes and the product simply breaks apart. To prevent this from happening, you can make a ladder with a barrier without liquid. One of the solutions is easy to implement in a wooden bath, the other in a bath with a concrete floor.
For wood:
- You will need a small sheet of galvanized metal measuring 62 × 38 cm.
- It must be marked as follows: from each edge, set aside 2 points at a distance of 10 cm. The points of the two sides must match so that a square with a side of 10 cm is obtained on the corner.
- In the resulting squares, a diagonal is drawn from the corner to the point.
- All points are connected by a line to form a rectangle inside. These marks will serve as our guide for the fold.
- At a distance of 17 cm from the edge of the smaller side in the middle of the sheet, we make a notch. This will be the center of the hole for the pipe if it is 50 mm in diameter.
- Now, along the lines drawn, it is necessary to bend this sheet to get a small trough.
- The sharp edges sticking out on the sides are bent to the larger side.
- A plastic or wooden plank is laid inside. In size, it should be 39 × 17 × 0.5 cm.
- The capacity of this container is about 6 liters. When the water begins to drain, it lifts the bar and freely enters the hole. After the level drops, the plank falls into place and closes the hole. This is done so that there is no smell.
- Even if it happens that the board freezes to the trough, then when hot liquid gets in, it quickly thaws.
Note! Such a drain mechanism will be very relevant for baths that stand on a pile or column foundation, when the temperature is below zero under the floor.

For concrete:
- In order to implement the project, you will need a plastic or durable rubber ball.
- When the floor is poured, it will need to be placed above the drain hole and drowned a little there. From above it can be pressed with something so that it does not move.
- An additional slope is created around the ball.
- In this position, the ball remains until the screed is completely solidified. After it is very simply separated from the frozen mixture.
- It is he who will serve as a shutter. When the water begins to drain, it will lift the ball. After that, it will fall into place and close the hole, preventing the penetration of an unpleasant odor. This should not freeze, and if it does, it thaws quickly enough.
Simple water collection systems

To implement the following idea, you will need a plastic or metal barrel with a volume of 200 liters.
- A place is chosen near the bath.
- A hole is dug to a depth below freezing of the soil. Its diameter should be 30 cm larger than the diameter of the barrel. This is necessary for ease of installation.
- A layer of sand of 10 cm is laid on the bottom and is well rammed.
- For another 10 cm, a layer of fine gravel is laid and is also well rammed.
- A hole is cut in the side wall for a pipe through which water will flow.
- A hole is drilled in the bottom with a drill and a feather drill for 26 mm. It is necessary for the ventilation hose.
- A nut is screwed onto the ¾" pipe and a sealing gasket is put on. It is pushed through the hole. Another gasket is put on and the whole structure is fixed with a second nut. An adapter is screwed onto the upper thread to the HDPE pipe, which will act as a ventilation pipe.
- The barrel is placed upside down in the pit.
- A drain pipe is connected. It is desirable that it go inside by 15‒20 cm. So, when the soil is displaced, it will not be pulled out.
- Approximately to the middle of the pit, it is covered with gravel and rammed, but so as not to damage the barrel. The remaining space is filled with soil.
This disposal method is also suitable for non-clay soils. The capacity is quite enough for 5 people to take a bath at the same time once a week.
Systems in heavy use

Such a septic tank is cleaned with a sewer. It must be positioned so that it has an entrance. The distance to the building must be at least 2 m. It is possible further, but then communications will have to be laid to a great depth.
In order to increase the interval between cleanings, you can make several cameras. In this case, the water will be cleaned more efficiently, and it will also be possible to increase the volume of average daily flows. The essence of the device is to make the first two containers sealed according to the described method, and make the last one with a filter bottom. At the same time, they are connected to each other with the help of pipes. In the first and second compartments, heavy particles settle. There they are decomposed by bacteria. Partially purified water enters the third section, which then goes into the ground.

Alternatively, you can use plastic containers or buy
- How to make a drain in the bath with your own hands
- Water ball valves: types, classification, device and principle of operation
- Sewerage in a private two-story house - scheme
- Piping in the bathroom: diagram and installation principle
- How to hide pipes in the bathroom with your own hands
- Repair and replacement of drain fittings of the toilet bowl
- Plastic pipes for sewerage in a private house: reliability and quality