Crown for interior door locks. How to install a lock on an interior door yourself

 Live Journal
 Facebook
 Twitter
Your task is to insert a lock into the door. If you decide that the door is interior, keep in mind that you should not install bulky locks with linings. We will look at the most familiar type of lock with a handle and a latch and how to correctly and quickly install a lock on an interior door. Being completely ready to work, we move on to the implementation recommendations.
When designing a doorway, you should pay attention to the choice of fittings. Fittings are a significant factor that guarantees the strength and durability of furniture. Its choice should be approached very carefully and attentively, not forgetting about the quality of all details.
The complete set of accessories consists of:
- A lock with a latch/handle is the type of locks we are used to. For sliding doors, a locking mechanism is often used in the form of a simple hook, which clings to a reciprocal tongue built into the doorway.
- Hinges - seem to be standard equipment, but when selecting them yourself, focus your attention on ordinary book hinges.
- Closers (used for sliding doors) - designed to create a device that allows for quiet, noise-free operation of sliding doors.
- Stoppers (used for sliding doors) are parts that provide fixation of sliding doors in any location.
- Rollers (used for sliding doors) are the most significant parts of the sliding design of sliding doors, with the help of which the door leaf moves. You should know that the most durable casters are made from aluminum.
- Sliding handles (used for sliding doors) - usually attached to the inside of the door base. When choosing, do not forget that the handles do not cling to each other and do not interfere with the sashes.
To resolve the issue of inserting a lock into an interior door, the following materials and tools must be present. Measuring tape - in the process of work there will be quite a considerable number of measurements. A manual milling cutter for inserting locks is a device used by specialists to guarantee more reliable quality accuracy in the selection of mounting recesses. It will help not damage the wooden door. It is an optional tool; without a hand router, you can use a simple hammer and chisel. A hammer and writing utensil for making marks - a simple pencil is best to avoid leaving marks.
A screwdriver or screwdriver - Phillips or flathead, depending on the screws provided with the lock.
Crowns for cutting round holes - select the size based on the size of the lock you are going to insert. Chisels of various widths for cutting out recesses for the lock bar and drill.
Installing a lock on an interior door: preparation
Before you begin assembling and installing the lock, you should decide on the procedure and their purpose.

All complete work includes the following processes:
- Analysis of such a problem as the position of the door in its set form - on which side the hinges are located, on which side the lock is located;
- Determining the location of the castle;
- Cutting a hole on the door base for the lock;
- Inserting a locking structure;
- Formation of the lock strike plate;
- Handle/latch introduction;
- Lock installation.
Having everything you need for work and assigning tasks, you can begin development!
Step-by-step instructions for installing a lock on an interior door with your own hands
Let's begin forming the locking mechanism for the interior door and perform the following operations. To more reliably install a lock and handle/latch on an interior door, it is necessary to determine the location of the finished door. You should consider which side the hinges are on and which side the lock will be located on. It is better to place the door against the wall near the opening and visually resolve this issue.
Typically, locks and handles intended for doors made of MDF are placed at a distance of 90-100 cm from the bottom border of the door base, since it is at this height that the door structure is designed to place a wooden beam to place the lock. We measure the required size. Having designated a place, fix it on the plane and at the end of the door. There will be a recess for the lock here.

When determining, do not forget that the location of the door handle should be convenient for everyone's use.
Using a tape measure, measure the gap from the visible edge of the lock device to the eyelet, where the pin will be placed causing the structure to operate. We mark the resulting value at the designated height, fixing exactly the same distance from the edge of the door. Now you should select the necessary bit to use the drill.
When selecting this part, be sure that it is the right size so that the lock structure can be placed in the hole itself without difficulty and the door leaf is not damaged: the diameter must be suitable for the thickness of the lock, the depth of the hole must be suitable for the length of the structure itself - this is necessary for the correct operation of the handle/ latches. Next, place the bit on a drill with a drill bit and make a hole. It is safer to make a hole in two stages: drilling from both sides alternately.
When working with a drill, do not forget about ensuring personal safety!
We place the lock on the prepared marking and mark the recess for its decorative strip - we outline its visible part along the perimeter, then remove the lock from the recess. We cut out the pocket using a hand router, or, if one is not available, with a hammer and chisel. It is necessary to knock out the recess, taking into account the clear immersion of the outer plate into it. Having positioned the chisel vertically relative to the end of the door, we make nicks all over the bottom. The chisel should be used extremely carefully so as not to make an extremely strong notch and spoil the end of the door.
Irreversible result: inserting a handle into an interior door
At this stage, nothing can be returned to its previous form or remade; you just need to finish the work you started.

There remain two final and most important processes:
- Insert handle/latch;
- Insert the response lock;
The intended work must be carried out clearly, following the instructions and using the necessary caution, which will ensure a satisfactory result and durability of the locking mechanism. If you need to insert a lock into a sliding door, you will need a special type of lock with a hook-like bolt. Handles for sliding doors are not anything special and are connected to the profile mechanism of the door leaves, which looks like a protrusion on them. The required tools and the work ahead are analogous to the process of inserting conventional door locks into interior doors, taking into account the needs of your type and size of the lock structure.
How to install a latch on an interior door yourself
When designing the counter part of the lock, turn the lock of the interior door in the closed state and place a mark on the doorway at the location of the lock tongue. Drill a hole to the depth of the latch exit. Remove the remaining material with a chisel and secure the striker with self-tapping screws.

A quality mortise lock or latch can only be installed with the right approach. It is necessary to make a plunge only after all measurements and calculations. It is better to cut holes for the lock using a drill attachment such as a crown. The insertion of hinges can be done both before and after insertion of the lock. But it is better to carry out work on a removed door.
When taking measurements during work, do not rely on your own eye - it is better to be sure of absolute accuracy than to make a ridiculous mistake.
How to put a lock on an interior door (video)
Inserting a lock into an interior door is an additional interior detail and an important condition of life. When performing this process, keep in mind that any action can only be performed once! Do not forget that when working you should be as careful and vigilant as possible.
Do you want to have your own space and be sure that no one will break into it? Then installing a lock on your interior door is the only right decision for you. You can do this yourself, without resorting to outside help. It is only important to choose the right accessories. It must be of high quality, match the interior in shape, color and design.
Choosing a lock for an interior door
Based on function and design, there are several types of door locks:
- regular latch or halyard lock;
- latch with lock;
- mortise;
- magnetic;
- overhead;
- latch;
- latch;
- level
This is the most primitive type of lock, which is used in almost all interior doors. It is a simple design consisting of a cylinder and a plastic or metal tongue. Often such a mechanism is mounted together with a handle that controls the tongue.
The latch is the simplest mechanism installed on interior doors
The purpose of a halyard lock is to keep the door closed. A conventional latch is simple, reliable in operation, and characterized by a wide range of designs. However, due to the overly simple mechanism, it has not found widespread use.
Locking latch. It is considered a variation of a regular latch, which is equipped with an additional latch. It blocks the movement of the handle. There are two types: lever and push-button. The first type is more practical and reliable. A push-button lock is no worse, but it can cause such an unpleasant situation as accidentally slamming the door.
The latch with a lock has a number of advantages: simple installation, simple design, wide selection of models. The disadvantage of this type of lock is its weak locking mechanism.
When purchasing a product, pay attention to whether the movements of the tongue are smooth and whether the spring returns it inside the door.
It was popularly called a mechanism with a key cylinder. Outwardly, it is similar to a lock for street doors, but has a simpler design. The device includes a cylinder and a lock block.
 Mortise locks are reliable and durable
 There are two types of cylinder: “key-key” and “key-turner”. The first is installed if the lock is used occasionally. The second, on the contrary, is suitable for more frequent use.
Mortise locks are used to close bedrooms, offices, and storage rooms. They reliably protect against penetration, are durable, and rarely break. If we talk about the disadvantages of the device, then this includes the complexity of installation and the dependence of the device parameters on the thickness of the door.
If you can afford to splurge, then this type of lock is for you. It is intended primarily for rooms where it should be as quiet as possible: bedrooms, children's rooms, offices.
 The magnetic lock is quiet, but its cost is quite high
 Silent operation is ensured due to its design, consisting of a crossbar, a strike plate, a magnet, and a case for the magnet. The bolt is attracted to a strike plate with a magnet, which is located on the box.
Along with the advantages of the product, there are disadvantages. Firstly, this is the impressive cost of the castle. Secondly, the lock case is not very compact in size, which is why it looks bulky.
Rim lock. Products of this type can rightfully be called a rarity. However, despite this, the demand for it has not fallen to this day due to the simplicity of the mechanism and uncomplicated installation.
Current models boast a comfortable body. The device is mounted on the inside or outside of the door, thereby providing protection against unexpected entry.
The original purpose of the lock was to secure one of the double doors. Currently, it is installed mainly in the bathroom and toilet.
 Espagnolette installed in bathrooms
 The operating principle of this product is so simple that even a small child can handle it. Its installation does not require special knowledge and experience.
Latch. This is the simplest type of castle. A latch is a metal plate with a retractable lever. It is installed as a main or auxiliary lock.
The mechanism has become widespread due to its high degree of reliability and protection. It is used for both street and interior doors.
To fix the bolt in the mechanism, plates (levers) with grooves of various shapes are used.
 Level lock has a high degree of security
 Each insert has a corresponding key bit profile. The lock will open only when the levers are in the correct position and the groove is free for the bolt to pass through.
If you have made your choice in favor of a stylish but simple lock, you can get to work.
Tools and materials
To install the mechanism you will need the following materials:
- handles of any shape (round, in the shape of the letter “G”) – 2 pieces;
- cylinder mechanism with spring;
- fastening screws that connect the cylinder mechanisms;
- crossbars;
- sockets for closing cylinder devices – 2 pieces.
In addition to materials, the work requires a small set of tools:
- a simple pencil;
- roulette;
- drill;
- office knife;
- chisels at 0.1 and 0.2 cm;
- feather drill 2.3 cm;
- drill 0.2 cm;
- crown 5.4 or 5 cm based on the thickness of the door;
- masking tape;
- hammer.
If you don’t have any of the listed tools at home, you will have to buy more. Their cost is low, and they are always useful on the farm.
Lock installation
Installing the mechanism yourself will not be difficult. You just need to forget about the rush and be attentive enough. The success of the business depends on many factors, including the type of door.
The easiest way is to insert the lock into a piece of wood. It will be more difficult with a product made from MDF, since it already requires skills and knowledge. Therefore, in this case, it is better not to take risks, but to call for help from a master of his craft..
Otherwise, poorly performed work will lead to damage to the mechanism, which will require it to be repaired or even require a complete replacement of the product.
Preparatory stage
Marking is the initial step towards installing a lock. The first thing to do is to prevent possible damage to the door.
 The lock is mounted at a distance of about 1 m from the floor
 For this purpose, measure a distance on the canvas of 0.9 - 1.1 m from the floor covering - this is the location of the lock. Then apply masking tape in that place to the end and surface of the door. This procedure will not only protect your product from scratches, but will also make it easier to take measurements.
The template is sold with a lock included in the set. It allows you to accurately apply marks indicating the position of the holes. To do this, fold the stencil along the fold line and attach it to the end. Then use a self-tapping screw to mark the centers of the holes on the end and on the flat surface of the canvas.
Making holes for the handle and lock mechanism
After applying the markings, proceed to the following stages of work:

Mortising a lock with a router
A small vertical machine is called a milling machine. It is easy enough to use, so even a beginner can operate it. To embed a lock into an interior door using a machine with your own hands, you must:
- Place the canvas perpendicularly on its side and secure it with a slipway.
- Measure and mark for the tongue.
- Place the lock on the sash so that the marked line runs clearly in the middle of the recess made under the tongue. Trace the body of the product with a pencil, as well as the bar along the upper and lower borders.
- Draw straight lines on the end of the canvas. Use a square if necessary.
- Use the machine to select the opening for the lock.
- Change the cutter in the machine, based on the dimensions of the plank, and adjust the depth required for its thickness. Make a notch in the center.
- Make a socket for the lock case. To do this, draw a straight line in the middle of the marking.
- Drill holes on the resulting line with a drill. The wood that remains is removed with a hammer and chisel.
 The opening for the lock can be made with a router
 Thus, an opening for the lock was created. To check if everything is done correctly, insert the device into the seat.
Mortise a lock without a cutter
The absence of a cutter is not a reason to put off installing a lock until better times. To perform the installation, the most common tools that can be found in any home are suitable.

Although it should be noted that there are cases when you cannot cope without a professional machine. For example, installing a lock with a latch.
Mechanism insert with cylinder
Sometimes a lock is installed on a door that already has a handle. It is for such situations that mechanisms with a larva are designed. They have the shape of a rectangle, so this work will seem overwhelming for a self-taught master.
 Locks with a cylinder are mounted in doors with an installed handle
 However, you don't need any tools or skills. Only after trying, you will learn how easy it is to insert a lock with a cylinder into a wooden door.
To do this, find a place for the lock (above or under the handle) and undertake the following points:
- On the end part, draw a center line where the mechanism is mounted.
- Attach the lock and make marks indicating the height of the product.
- Drill holes along the center line with a small distance between them.
- Using a drill, remove the jumpers between the holes and make a neat socket that matches the size of the lock.
- Place the mechanism in the resulting opening, secure it with self-tapping screws. Using a utility knife, mark and cut out the perimeter of the locking plate to approximately the same thickness as the locking plate itself.
- Remove the mechanism and use chisels to make an opening for the device.
- Place the lock against a flat surface of the canvas and mark the location of the cylinder. Then outline the larva. Do the same on the back side of the door.
- Drill a hole for the larva. In order for the device to fit in freely, you need to go slightly beyond the contours of the markings.
- Place the lock and screw it with self-tapping screws, the holes for which should have been made in advance.
- Attach the cylinder and check how the mechanism functions. Place linings on it using self-tapping screws as decoration.
Installation of the lock mate
This is the final moment of installing the locking mechanism. To install the response part, follow these steps:
- Close the door and draw two lines on the opening, the distance between which corresponds to the size of the lock latch.
- Measure how far the beginning of the latch is from the corner of the door.
- Measure exactly the same distance on the opening - this is the beginning of the recess.
- If you are going to recess the counter part into the jamb, then install it in place and trace it with a pencil along the inner and outer contour. If not, then outline only the inner one.
- Before installing the answer, use a tool to make indentations for the tongue and screws.
- Install the striker and close the doors. If excess play occurs, eliminate it by bending the tongue on the response.
 The lock mate is secured with self-tapping screws
 Thus, you have come to the finish line. Installing a new lock or replacing an old one is not a very complicated process, but it requires care. When changing the previous mechanism, make sure once again that reinstallation is advisable. After all, the problem can sometimes be solved by simply adjusting the device.
The question of how to embed a lock into a wooden door yourself often arises before those who decide all repair issues themselves. In other life situations, such skills and knowledge can also be useful, especially since there is nothing complicated about it.
First, you need to figure out which doors you need to install a lock on and, in accordance with their type, choose a suitable locking device.
Wooden doors are intended for:
- input
- interior
By appearance and type of operation:
Have you decided on the type of door? Let's start choosing the optimal lock.
Lock selection
There are three types of locks:

A rim lock on a wooden door leaf does not look aesthetically pleasing.

You cannot find a better mortise-type locking device for both interior and entrance doors. Installing such a lock will require some knowledge and skill, but, if desired, anyone can do it. When purchasing, you should take into account the direction of opening the door and, accordingly, choose a “right or left” lock. There are also universal models suitable for any occasion.
For an interior door, it is better to choose a lock without a keyhole with a magnetic or halyard latch, when turning the handle activates the mechanism.

For sliding types of doors, there are models of locks on sale with a special hook that secures the doors in the closed state.
For entrance doors, locks with bolts are chosen; this is the most reliable type against burglary.
Tools
The first step in preparing for work is selecting the tools that will be needed to install a mortise lock. You will need:

- pencil or pen for marking
- electric drill
- a feather drill, the width of which corresponds to the thickness of the lock
- set of wood drills from 2 to 7 mm
- narrow and wide chisel
- screwdriver
- screwdriver
- hammer or chisel
- tape measure, square or ruler
Making a groove for a lock
- Determine the location of the lock on the door. As a rule, the lock is embedded 1 meter from the floor - plus/minus 10 cm depending on the height of those who will mainly use it.
- Apply the lock to the door leaf with the side that you will cut in, and trace it with a pen or pencil.
- Drill a hole equal to the width of the lock using a feather drill. You can do this in two ways:
- do not drill a hole to the full depth at once, but move gradually 1-2 cm to the required mark in the door leaf
- Drill to the full depth at once, having previously made marks on the drill equal to the width of the lock being embedded. To do this, you can use electrical tape or a piece of wire.
It should be noted that it is necessary to drill 1-3 mm larger than the size of the lock body, since it must fit into the drilled groove without obstacles, and the front plate must be placed completely in it.
During drilling, the drill must be held level, perpendicular to the blade, so that there is no displacement of the groove being drilled.
- Process the groove using a chisel and hammer. Its walls should be as smooth as possible so that the lock fits neatly inside the door leaf.
- Make markings for the front lock bar if you are sure that it fits into the groove without any hindrance. To do this, insert the lock into it and trace the outline of the bar with a pencil. Using a chisel, use a chisel to knock out a notch according to the markings.
Installing a lock and handle
Is the groove ready? Proceed to installing the locking device.
- Make markings for the cylinder and door handle. You need to pay close attention to this and be careful, otherwise you can ruin everything. Place the lock opposite the groove and, using measuring instruments (ruler, square), accurately mark the future location of the keyhole and door handle.
- Using suitable drills, make the necessary holes for the handle and cylinder.
- Insert the lock into the hole and, if everything fits, screw it to the door leaf with the screws that should come with the lock. If it doesn’t fit, then continue to align the groove with a chisel and file, not forgetting to constantly double-check how the lock fits into it.
Lock assembly and adjustment
Now you need to adjust the operation of the lock and drill holes for the bolts and latch.

- Insert the cylinder into the lock and secure it with the supplied bolt. Check how it works. If everything is fine, secure the handle and faceplate.
- Lubricate the bolts and latch with dye, close the door and turn the key so that obvious marks remain on the jamb.
- Cut the wood to the required depth of the bolts and latches. Use a chisel to trim the edges to exact dimensions.
- Prepare the recess for the striker (also use measuring tools during this work) so that it is flush with the surface of the box. Screw it on using the screws supplied with the lock.
Everything is ready - you have managed to install a mortise lock on a wooden door. Use the handle and key to make sure everything is level and the lock is comfortable to use. Using a chisel, correct the location of the lock parts if you made a mistake somewhere.
Greetings, friends!
As you know, friends, I am not a supporter of overpaying and I believe that even the most desperate handymen can easily install a lock or latch on their own!
I will show the whole process using the example of MDF doors, which are the most fragile and delicate (and cheap:).
It is necessary to start installing the latch only after and, and of course after.
Necessary tool
- Hammer
- Screwdriver or drill
- Spade drill ∅ 20mm
- 20 mm chisel
- Pencil
- Square (although you can do without it)
As you can see, the tool is quite simple and should be present in almost every handyman! So, if everything is available, then you can get started!!!
How to properly install a lock on an interior door
The first step is to decide at what height our castle will be. The standard recommended height is 965mm, but I usually make the top edge of the lock 1005mm. The difference is insignificant, but it seems to me that it is more convenient. 
IT IS IMPORTANT TO KNOW!
When marking the lock, you should not go too far beyond the recommended dimensions, since MDF doors have a special additional beam for installing a lock. And if you deviate too much from the norm, you can ruin the door :(
After marking the height of the lock, we beat off the top edge of the lock with coal.
We attach the latch to the side of the door so that its upper part coincides with the mark and place a mark in the place where the handles will be attached.

Next, use a drill bit to drill a through hole.

At first I tried to drill with a screwdriver, but it turned out that it was a little weak and I had to resort to a drill.
IT IS IMPORTANT TO KNOW!
Friends, when you drill a hole for inserting locks into an interior door, under no circumstances press on the drill or crown (if you are installing a knob handle). The thing is that if you press hard, you risk tearing out a piece of the door on the exit side of the drill, so you need to drill slowly, adjusting the pressure.

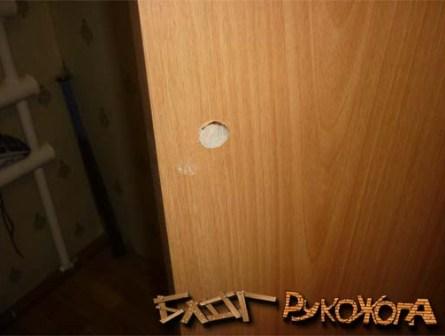
In the next photo you can see that the drilled hole is a little small for the lock.

Use a chisel to widen the hole so as not to split the door. Slowly tapping with a hammer, we achieve the desired size.

We work hard and voila...

I am satisfied with the result - the lock moves freely to the end.

Having fixed the lock (you can immediately put it on the screws), you need to use a sharp wallpaper knife to very carefully trace the contour of the lock. If in doubt, you can simply use a well-sharpened pencil. The point of this whole operation is to recess the lock flush with the surface of the door as accurately as possible.

Friends, if you get a little hands-on, it’s okay. With each door there will be more and more experience! After you have outlined the outline, you need to use a chisel to select a piece of wood to the depth of the castle. When the lock is flush, it can be attached with self-tapping screws.

IT IS IMPORTANT TO KNOW!
When working with a chisel, always hold it as shown in the picture above. If you turn the chisel over, then when you hit the hammer you will probably select more material, which of course can be corrected by adding all sorts of wood chips, but this is already “jamming”, and we can’t “do that”!
Now you can proceed to installing the handles. By the way, the guide for door handles should be mounted with the groove down.

By the way, a few words about the castle. I used a EURO lock.

Not the most expensive, but not the cheapest either. As a result, the plastic latch did not work even for one day - it slammed shut and left my wife and my youngest locked. I had to climb into their room through the window (luckily it was a private house) and open the latch. The next day I purchased PALLIDUM locks - no problems.
We put the door handles on the guides and use a screwdriver to screw each one onto three self-tapping screws.

As we remember, the guide is installed with the groove down. This was done so that the pin that directly holds the handle itself would secure it well.
 Door handles are installed.

We screw decorative rings onto them and move on to inserting the striker plate.
How to properly install the strike plate of an interior door lock
We close the door and make marks at the point of contact between the lock tongue and the door frame.

We attach the striker plate and trace it just like the latch itself. Here I used a pencil.

We repeat all operations:
- Use a feather drill to drill a hole for the lock tongue.
- Use a chisel to make the hole perfect.
- Carefully remove the layer in order to recess the bar. Keep in mind that the MDF door frame is “crazy” cardboard and you will have to sweat a little so as not to “jam.”
And here is the result.

We fasten the bar and the lock is ready.

When closing/opening the lock, the door should close easily. If, when opening another door, a draft is created and the door seems to vibrate in the groove, then you need to tighten the tongue, which is located in the striker.

Well, that's all, friends. I hope I was able to answer the question: “How to fit a lock into an interior door.”
Now you can begin installing the slopes and the final step is installing the casings.
Thank you for your attention!
This article is a step-by-step instruction on how to embed a lock into interior doors with your own hands. Here, ZAMSERVICE specialists share their skills and experience, describe the installation process in detail, and also give personal recommendations regarding the choice of a locking system. By following their advice, you can easily install the lock yourself.
If you bought an interior door without a lock or the old mechanism has expired, then it’s time to familiarize yourself with the nuances of installing a new product. The ease of installation directly depends on the modification of the selected device. The easiest way to mount latch handles is by carefully cutting out a hole of the required diameter, while locks with cylinders, rotary latches and handles require a more complex installation process.
For what reasons may you need to mortise the lock yourself?
Interior doors are installed in every apartment or house. They competently divide space, serve as protection against unauthorized entry, drafts, extraneous noise, etc. The door leaves themselves are not complete without a reliable locking mechanism. Many door manufacturers do not provide them with built-in locks.
If you bought an interior door without a locking system, then you can install it yourself. The main thing is to approach this issue responsibly, not to rush, to act carefully and consistently.
Another reason to cut the lock into the door yourself is if the old device breaks down. This can happen due to the expiration of the operational life, due to improper use of the lock, ignoring preventive measures, as well as due to mechanical damage to the structure.
In some cases, inserting a lock with a cylinder allows you to avoid large-scale repairs in the future, since replacing the cylinder is much easier and cheaper than completely changing the locking structure. Replacing the core will also be appropriate in cases where keys are stuck in the keyhole, as well as if they are lost or stolen.
How to choose a lock for interior doors
Before you install a lock on your interior doors, you need to purchase one. The design should be chosen based on the parameters of the door leaf; in particular, it is worth taking measurements first. If the width of the vertical bar of the door is less than 4 cm, then mortizing the lock is not only a pointless exercise, but also practically impossible.

In this case, door latches are more suitable, as they are quite easy to install and are the easiest way to lock doors. In addition, the choice of such designs is more than diverse. The modern market offers products of various sizes, installation types, colors and designs.
If the doors have higher security requirements and their width exceeds 4 cm, then mortise locks for interior doors of any well-known brand will be suitable. They are available in a wide range, ranging from standard models to multifunctional designs complete with door handles. The appearance of the product also matters, so the locking mechanism, or rather its external parts, must be in harmony with the color and design of the door.
Correct markings – high-quality lock mortise
Installing any lock always starts with markings. It is very important to avoid mistakes at this stage, since incorrect measurements lead to incorrect formation of the seat, which will certainly affect the quality of installation work in the future. As a rule, the consequence of illiterate marking is a distortion of the structure. That is why the contours should be marked as accurately and carefully as possible.
Many manufacturers of high-quality fittings and locking and hardware products complete their products with special templates for marking. This greatly simplifies the process and guarantees the exact location of the lock on the door leaf. If such blanks are not provided in the package, then you will have to make the markings yourself by attaching the structure to the door and tracing its contours with a pencil or any other writing instrument (felt-tip pen, pen, marker, chalk, etc.)

Before you pick up the tools for drilling holes and forming seats, you need to double-check the correctness of the markings several times. This will ensure reliable operation of the mechanism and eliminate the formation of distortions.
Step-by-step instructions for installing a lock
So, a suitable design has been found and purchased at the store, so it’s time to start inserting the lock. To do this, you need to perform a number of sequential actions:
- Mark the location of the lock on the door (usually 1 meter from the floor).
- Drilling a hole for inserting a lock with a drill (the diameter of the pen drill must be equal to the thickness of the lock, and the depth of the drilled hole must match the length of the lock structure).
- Marking the outline of the base plate on the door leaf.
- Carefully drill a hole for the handle (the drill should go right through the door).
- Marking the hole for the screws (attaching the structure to the intended seat).
- Drilling a hole to attach the lock to the door leaf (according to the received markings).
- Installation of decorative overlays.
- Fixing the rod connecting the door handles.
- Closing the doors and marking the location of the tongue on the door jamb.
- Apply the receiving pad to the intended location and trace its outline using a simple pencil.
- Measuring the length of the lock tongue and transferring it to the door frame.
- Attaching the lining to the seat with self-tapping screws.
- Checking the functionality of the device (adjusting or reinstalling the tongue if necessary).
As a rule, the above instructions are suitable for all types of interior doors, including those made of particle board, natural wood and plastic (in this case, you need to buy special locks designed for PVC products).
Features of mortise locks for various types of doors
Before embedding the lock into the MDF door, it is necessary to accurately measure 1 meter from the floor, since it is at this height that the additional wooden beam is located, and the rest of the door is hollow. By ignoring this recommendation, you can ruin the door leaf, and hopelessly. If any difficulties arise with the installation process, it is better to immediately contact specialists. The locksmith will install the lock expertly, while the door will retain its presentability and functionality.

Metal doors for installation inside apartments and houses are very rarely used, however, if you have this particular type of door leaf, then it is more advisable to use the services of professionals. In addition to the fact that such doors require a special type of lock, the process itself is particularly complex.
Interior doors made of plastic are quite common in modern interiors. You can fit a lock into such doors with the same ease as into wooden ones. The only thing is that the locking device itself must be designed for use in PVC products. Otherwise, the advice of specialists on installing locking systems in interior units is almost identical to the instructions above.
What tools are needed to mortise a lock?
You can install a lock on interior doors using simple tools that every home craftsman has. You will need:
- Hand drill with feather drills
- Chisel.
- Screwdriver.
- Screwdrivers (phillips and flathead).
- Carpenter's square.
- Hammer.
- Roulette (ruler).
- Pencil (pen, thin marker, felt-tip pen, chalk).
So, we figured out what tools are needed to install standard locks on interior doors. This list may vary depending on the complexity of the work, the type of door or mechanism. Some devices can be replaced with analogues. For example, instead of a chisel, you can use a chisel, and self-tapping screws can be easily screwed in using a drill.
And yet, not all types of locks can be cut using available tools. In some cases, you may need a milling cutter - a special device for door blocks that ensures high accuracy of the landing recesses. The milling machine is quite compact and easy to use. Using it, you can cut a groove of any shape and size, give the edges of the workpiece the correct shape, prepare niches for hinges and seats for locking mechanisms.
Mortising a lock with a router
If you have a milling machine at your disposal, then the task of installing a lock on interior doors becomes much easier. The lock is inserted with a router in a vertical position of the door on its side, which is achieved by securing it with a slipway. This avoids the need to constantly support the blade with your hands.

Having fixed the position of the doors, we proceed to mortise the lock:
- We mark the seat of the lock body and tongue.
- We cut out a recess for the locking device using a hand router.
- We insert into the machine a cutter corresponding to the dimensions of the plank.
- Adjust the required depth.
- We make a recess in the center.
- We prepare the seat for the body.
- We straighten its edges using a chisel.
- We insert the lock according to the above instructions.
A router is not a necessary tool for installing locking mechanisms, but some types of locks are almost impossible to install without it. This applies to latched locks, for the installation of which it is necessary to prepare a neat hole for the keyhole. Mortizing a lock without a cutter in the case of standard devices for interior doors is quite possible if you have all the necessary tools at hand.
In addition to step-by-step instructions for inserting locks into interior doors, each master has his own secrets that allow him to complete the installation as efficiently and quickly as possible:
- In order not to cut off extra millimeters with a router, the contours of the external markings can be limited with masking tape.
- Drilling through doors can damage the door leaf, so you can divide this stage into two steps. First you need to drill the door on one side, continuing drilling until the point of the drill appears on the back side. Then perform similar actions on the other side of the doors, using the resulting hole as the center.
- To hide the lock well in the hole, its depth should be 2-3 mm greater than the width of the lock body.
- If the lock is installed correctly, the door will unlock/lock without jamming or unnecessary effort. Otherwise, it is necessary to change the location of the counter plate.
- If you do not have suitable tools for installing locks, but you are going to buy them, then pay attention to special kits for inserting locking mechanisms. These kits include drills and bits that are exactly the right size.
- Immediately before attaching the lock to the door with self-tapping screws, it is recommended to verify its functionality. Try repeating several cycles of unlocking/locking the lock with the key and make sure that the mechanism is working properly.
Of course, you can install a lock in the door yourself, but if you are not confident in your own abilities and experience, then do not risk the doors and order installation from a professional service. Our technicians will come to your home and install the device quickly and efficiently.
While wooden doors and MDF panels are easily sawed and drilled, it is not so easy to install a mechanism in metal and plastic blocks. Therefore, in these cases it is also more advisable to contact specialists.
- How to install a lock on an interior door yourself
- How to calculate sliding wardrobe doors Calculation of a mirrored sliding wardrobe door
- Swing gates - manufacturing and installation on your own Do-it-yourself gates for a summer residence (drawings)
- DIY swing gates
- Do-it-yourself swing gates Making your own gates
- Do-it-yourself swing gates, drawings, videos, step-by-step instructions DIY metal swing gates with a wicket
- Advertising on building facades - types and features of approval. Placement of outdoor advertising at the end of the house