Connecting a washing machine: 5 ways of varying complexity
 Live Journal
 Facebook
 Twitter
Is it difficult to connect the washing machine to the water supply? Not at all. In this article, I will offer several connection scenarios with a description of the necessary fittings and the technology for its installation, and I will also tell you in what ways you can connect the drain hose of the machine to the sewerage system.
With a new thing! It remains a mere trifle - to connect the product to the sewer and water supply.
Water pipes
Requirements
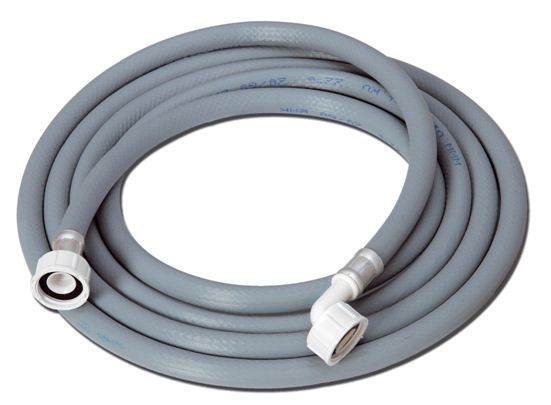
To connect with a standard hose, we need to bring the outlet from the cold water supply system with an external pipe thread of 3/4 inch, or DN20. The thread must be at least five threads long and not have a shoulder - a limiter, against which the union nut of the hose can abut.
In addition, the edge of the thread must be perfectly even and of sufficient thickness, since the connection to the hose is sealed by a gasket between it and the union nut.
The outlet to the machine must be closed. The water should be turned off when leaving for a business trip or vacation for safety reasons: the rubber hose that connects the washing machine to the water supply has a limited service life, and if it ends in your absence, the apartments below you will be flooded down the riser.
From the point of view of the minimum pressure drop when the washing machine draws water, it is better to place it as close as possible to the cold water riser. First of all, this refers to the apartments of the old fund with steel water supply pipes left after the builders. The condition of steel in cold water after several decades of operation leaves much to be desired: they are overgrown with rust and lime deposits, significantly reducing the clearance inside the pipe.

Option 1: outlet to the tank
In houses built in the 70s and later years, the outlet from the cold water riser to connect the tank is made at the level of the main water supply. Its location makes it possible to insert a faucet or an assembly for connecting a washing machine into the supply to the tank, without leaving a sagging hose in sight.
accessories
What hardware is needed to connect?
The simplest solution that does not require the purchase of additional components is a three-way faucet designed specifically for connecting washing machines. The price of such a product does not exceed 200 rubles.
When buying it, you should pay attention to a number of product features:
- ball a faucet (closing by turning the flag 90 degrees) is preferable to a screw (closing by turning the lamb a few turns). Unlike the latter, it has an almost unlimited service life and does not require maintenance;
- How longer handle turning the tap, the easier it is to open or close it after a long period of inactivity;
- External thread DN15 on the valve body must have a collar, which does not allow the winding to be squeezed out when the valve is screwed into the coupling body or any other internal thread.

If for some reason there are no treasured taps in the nearby stores, an assembly of several products can be used to connect.
You will need:
- Tee DN15 with one internal thread and two external threads;

- Ball valve DN 15 with female-female threads. If the old faucet that shuts off the water to the tank is faulty and needs to be replaced, it is worth buying two identical faucets;

- Adapter DN15 - DU20 with external threads. Preferably brass: black steel will quickly rust due to contact with condensate.

Installation
How to connect a washing machine with a three-way tap?
The instruction is pretty simple:
- Shut off cold water to the apartment;
- We unscrew the flexible liner of the drain tank from the cold water liner;
- We wind up the thread of the liner and screw on it a branch with an internal thread of a three-way valve;
To wind the threads, use sanitary flax impregnated with any quick-drying paint that is at hand. The paint will protect the flax fibers from rotting in contact with the inevitable condensation on cold water.

- We attach the flexible hose of the drain tank to the external thread of the DN15 size of the three-pass valve. If there was a separate valve in front of the tank, we put it between the three-way faucet and the flexible piping;
- We connect the inlet hose of the washing machine to its outlet with a size of DN20;
- We open the tap at the entrance to the apartment and check all connections under pressure. If necessary, we correct all the shortcomings.

If you are going to install a tee, ball valve, and adapter assembly, you will need to assemble several sealed threaded connections:
- Between the tee and the thread of the eyeliner;
- Between the tee and taps to turn off the water to the tank and to the washing machine;
- Between the tap for turning off the water to the machine and the adapter for size DN20.
Option 2: in front of the bathroom faucet
With this scheme for connecting the washing machine to the water supply, the mixer will move forward relative to the wall by 7-8 centimeters. The connection in front of the mixer is usually used if the washing machine is installed in place of the dismantled washbasin.

accessories
To connect, you will need to purchase:
- Already familiar to us three-way valve. Recommendations for choosing it are the same as in the previous scenario;
- Thread extension DU15 - a branch pipe with an external thread on one side and with an internal thread on the other. The length of the nozzle must be exactly equal to the length of the three-way valve.

Installation
- We block the valves of cold and hot water at the entrance to the apartment;
- After making sure that the water has shut off, unscrew the union nuts of the mixer and remove it from the spigots (eccentrics);

- Unscrew the leggings. Depending on their shape, pliers inserted inside the eccentric with one sponge, a narrow adjustable or open-end wrench, and a hexagon can be used for this purpose;
- We wind up the external threads of the three-pass valve and extension cord;
- We screw the tap into a corner, a coupling or a water outlet in cold water, and an extension cord in hot water;
- We screw the eccentrics into the internal threads of the three-way valve and the extension and center them so that the mixer nuts go into their threads, and the mixer body is in a horizontal position;
- We screw decorative caps onto the threads of the scythes (of course, you can do without them) and mount the mixer.

In the photo: 1-three-pass valve, 2 - thread extension having the same length, 3 - eccentric.
If the gaskets under the union nuts of the mixer have lost their elasticity, replace them with new ones. Rubber gaskets are included in most plumbing repair kits, but over-the-counter silicone gaskets are the most flexible and durable.
Option 3: under the kitchen sink
When installing a washing machine in the kitchen, it is connected to the cold water supply under the kitchen sink. The faucet is mounted between a hard connection and a flexible hose to connect the faucet.
accessories
And here our old friend, a three-pass valve, plays its role. If necessary, it can be replaced by an assembly of a tee, a ball valve and an adapter from a 1/2 inch thread to a 3/4 thread, as well as when connecting to a tank inlet.

Installation
Do-it-yourself crane installation is extremely simple:
- With the water supply turned off, unscrew the union nut of the flexible connection;
Do not be too lazy to substitute a basin or bucket under the connection that you are disassembling. The water standing in the pipes will merge when the water supply is depressurized.
- We wind the thread and screw on it the internal thread of the three-way valve;
- We connect the flexible hose of the mixer to the external thread of the tap size DU15.

Option 4: at the entrance to the apartment
In some cases, it is more convenient to make a tie-in immediately after the cold water valve at the entrance to the apartment. What is needed for this and how to crash into the water supply? I will describe the most common scenario - a tie-in after the cranes in an assembly with steel spurs.
accessories
We will need:
- Brass or cast iron tee size DU15;

- Ball valve with female-male threads, size DN15;
- Adapter from thread DN 15 to DN 20.
Installation
- We block the cold water supply with a valve on the liner. We open any tap to make sure that the valve is working;
- We drive a lock nut along the long thread of the drive (a pipe with a long thread on one side and a short thread on the other). If the paint interferes, pre-anneal it with a building hair dryer, blowtorch or gas burner;

Sgon - a fitting for connecting fixed sections of the water supply.
- We clean the thread from the old winding and after the lock nut we drive the coupling;
- Having parted the eyeliners before and after the disassembled section in different directions, we unscrew the drive from the valve;
The valve must be held with a second key, otherwise there is a risk that the threaded connection between it and the outlet from the riser that has moved out of place will leak.
- We unscrew the coupling from the drive and screw a tee in its place;

- We screw the drive with a wound short thread into the valve;
- We wind up a short thread on the eyeliner from the side of the apartment and drive a tee onto it, turning its side outlet parallel to the wall (up or down);
- We drive the locknut after the tee. Leaving a gap of 5 millimeters between it and the tee, we wind the thread and tighten the lock nut;
- Consistently we screw the wound tap and adapter into the tee. Work completed.
Option 5: saddle
accessories
Saddle - a simple device that allows you to crash into any section of a smooth pipe. It is a clamp with a sealing gasket and a side outlet with an internal thread. The advantage of the saddle is that it allows you to insert into the water supply under pressure.

In addition to the saddle for the DN15 pipe, we need a ball valve with female-male threads and an adapter DN15 - DN20.
Installation
- We clean the pipe from paint and rust. To do this, you can use a steel brush or a regular table knife;

- We install the saddle in a position convenient for connecting the washing machine and tighten its fastening;
- We wind up the external thread of the ball valve and screw it into the saddle;
- Fully open the tap;
- Substituting a bucket or basin under the tap, we drill the eyeliner with a long drill directly through the open tap and saddle;
Use only a hand drill or a hand drill. An electric drill flooded with water, along with a puddle of water on the floor, will turn into a portable version of the electric chair. Power tools may only be used when water is shut off.

- As soon as the water flows through the tap with sufficient pressure, we take out the drill and close the ball valve;
- We screw a 3/4 inch adapter into its internal thread.
Sewerage
You can also connect the drain hose of the washing machine to the sewer in several ways.
On the edge of a bathtub or sink
The simplest solution is to hang the hose fixed in the standard fixture on the edge of the kitchen sink or bathtub. The obvious disadvantage of this solution is that the plumbing fixture cannot be used during washing.

But the frequent draining of hot water with the detergent dissolved in it guarantees the absence of blockages: for 4 years of living in a service apartment with just such a scheme for draining water by a washing machine, I have never encountered sewage problems.
Tee under the siphon
The drain hose can be directed to a tee installed in the sewer socket at the connection with the siphon of any plumbing fixture. Installation of a tee in the case of a prefabricated plastic sewer takes no more than a couple of minutes.
A couple of nuances:
- The hose connection to the tee must be . Otherwise, through the gap between them, sewer smells can penetrate into the apartment;

- Use a slanted tee with the side outlet pointing up. Even if the connection is depressurized, drains will fall into the sewer by gravity.

Tee in comb
The most civilized solution is a separate tee for connecting a washing machine, embedded in a sewer comb (internal sewerage). In this case, you can safely use a straight tee.
I strongly advise you to build up its upper outlet with a pipe no less than 40-45 cm long: some washing machines do not have a shut-off valve between the tank and the drain hose, and if the hose is lowered too low, water can flow out of the tank by gravity.

The most correct scheme for connecting to the sewer is with a separate tie-in to the comb and a water seal.
Conclusion
I hope that my experience will help the reader to connect the washing machine with a minimum investment of time and money. As usual, you can find more information in the video in this article. I would appreciate your additions and comments. Good luck, comrades!
- How to make a drain in the bath with your own hands
- Water ball valves: types, classification, device and principle of operation
- Sewerage in a private two-story house - scheme
- Piping in the bathroom: scheme and principle of installation
- How to hide pipes in the bathroom with your own hands
- Repair and replacement of drain fittings of the toilet bowl
- Plastic pipes for sewerage in a private house: reliability and quality